Sabitlenmiş Tweet
Legsw
1.1K posts

Legsw
@Legswav
Measuring Success in Sphere🔥 What once caused catastrophe in my life has now become the catalyst for my direction. God reviews we execute JUST GETTING STARTED
Katılım Mayıs 2025
611 Takip Edilen83 Takipçiler

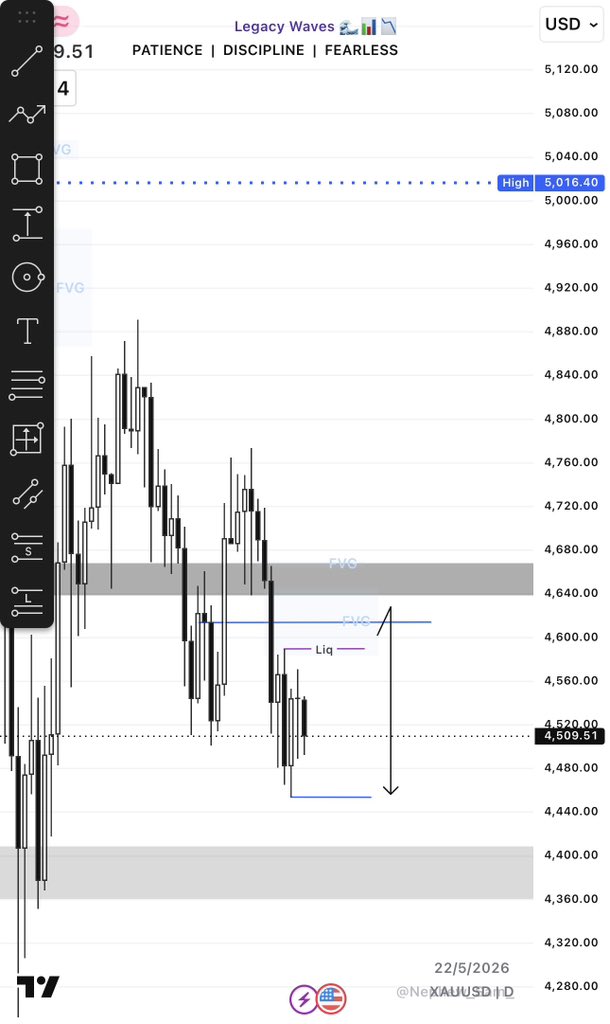
If you joined the Final Quest Bootcamp Day 1, this chart won't look strange to you because Mpa @The_4thMan gave a thorough explanation as to why price will always come back to fill an inefficient price action before continuing its move.
Join us for Day 4 today


English

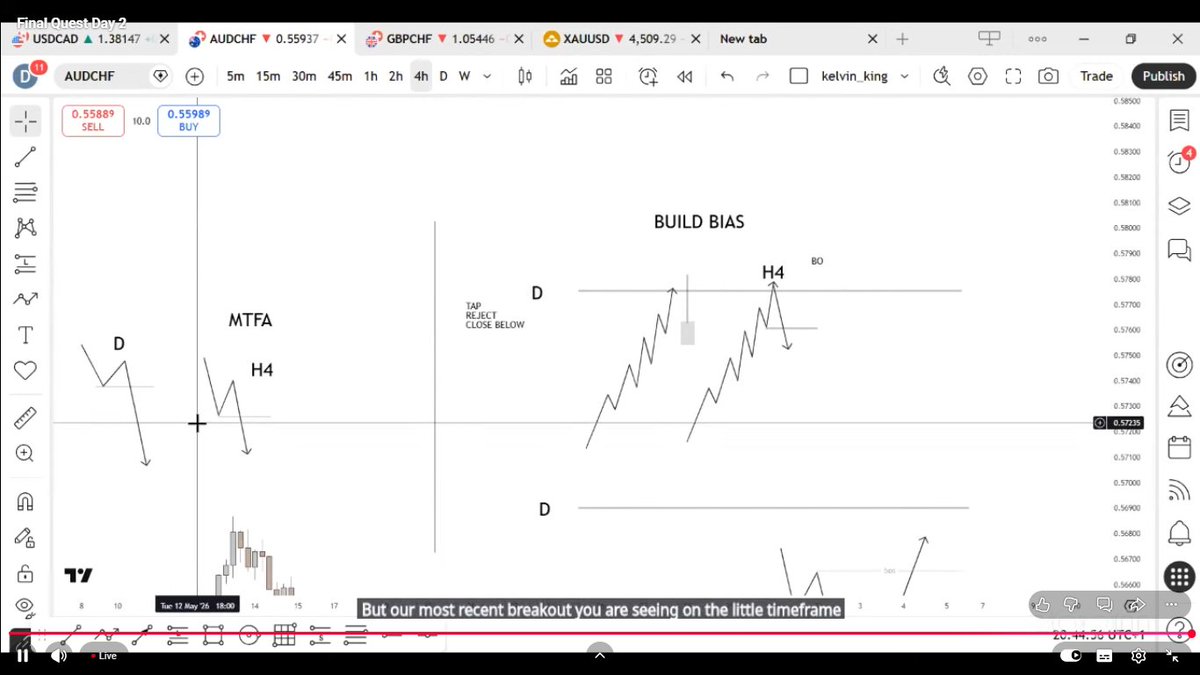
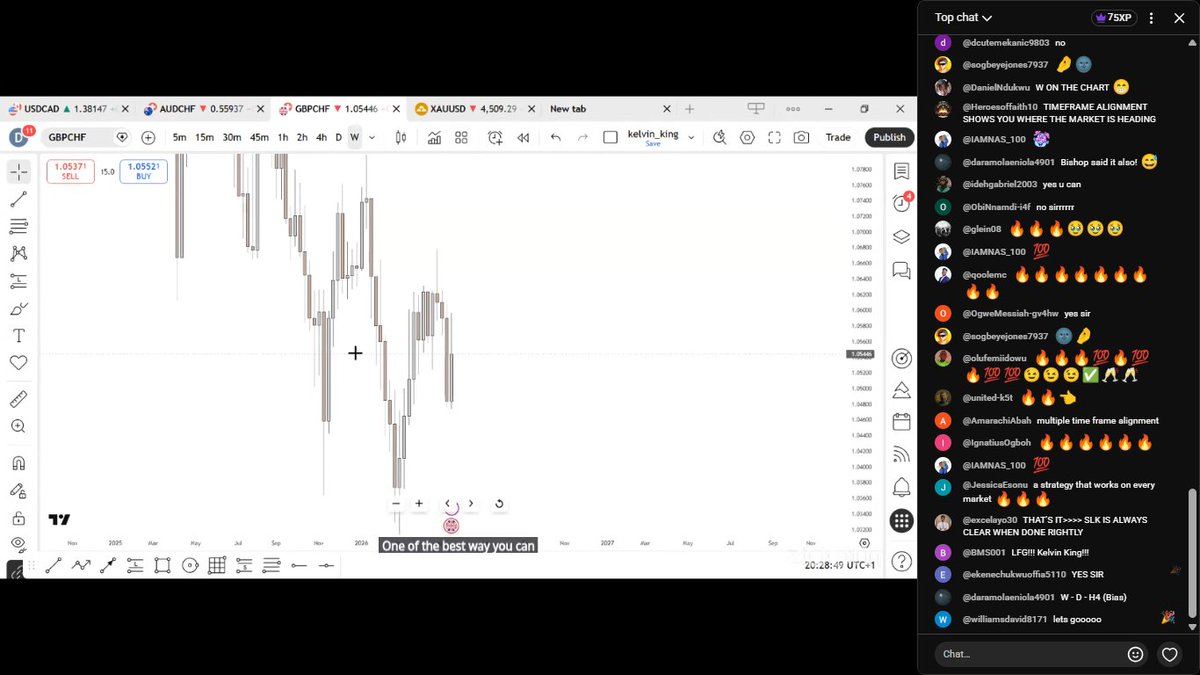
Key Points on Building bias on Day 2 with @Kelvinking_
- We might be trading the same thing but what differentiates us is our level of patience.
- Build bias when all timeframes are in alignment. When you see this, ALIGNMENT DON COOK!!!
- Before going into your daily rejects daily, ensure have a checklist of what you want to see.
- For your Multi-Timeframe analysis, focus on the Weekly, Daily and H4 timeframes.
- Once you have your weekly direction, focus on the Daily and H4.
- You want to see 3 things on your daily timeframe after coming from the weekly. A tap of a key level, a rejection and closure below.
- The best trade presentations show when the daily rejects daily today and closes and the H4 breakout happens the next day.
- Be Patient


Benjamin Protocol Inc.@BenjaminIn168
Day 2 of Final Quest Bootcamp 2026 kicks off in a few hours! 🔥 We're excited to have Kelvin King dropping Gems today! Big shoutout to our sponsors for empowering aspiring traders! Drink Deep, Don’t miss it! 🚀📈 #FinalQuest2026 #BenjaminProtocol #Forex #Crypto #Tradewith4th
English

@dondebanks @nanfukajamillah The world is ending soon and am not sure they will be able to meet up
English

Legsw retweetledi
Legsw retweetledi
Legsw retweetledi
Legsw retweetledi
Legsw retweetledi

@gfy_26 Yami this is massive for real ❤️
Next will be a 4 wheel 🤑💫
English

I’ve Been trading forex for 17 years now… finally seeing results 🙏
Started this journey when I was just a kid, no capital, no guidance, just pure curiosity and a lot of losses. Blew accounts, doubted myself, almost quit multiple times. There were days I questioned if this thing was even real or if I was just chasing something that wasn’t meant for me.
People see the wins now, but they don’t see the sleepless nights, the frustration, the charts that didn’t make sense, the discipline it took to keep going when nothing was working. This journey tested me mentally more than anything.
But I stayed consistent. Kept learning. Kept showing up.
Big shoutout to @AU79executioner for the guidance and knowledge that helped me finally put things together. Sometimes all you need is the right direction at the right time.
at 21, I just bought my first ride from trading profits. It may not be a Lambo, but it’s proof that this thing works if you don’t give up.
Moral of the story: trust the process, stay disciplined, and don’t let early losses define your future.
We’re just getting started 🚀🎉🎊🎊🎊
FXNG baddies, here I come🤲😂😂🎉

GFY@gfy_26
First key🙂↔️🎉🎊 Guess the name of the car🌚🙂↔️
English
Legsw retweetledi

📂 Technical Analysis
┃
┣ 📂 Chart Setup
┃ ┣ 📂 Monthly Chart
┃ ┣ 📂 Weekly Chart
┃ ┣ 📂 Daily Chart
┃ ┣ 📂 Clean Candles
┃ ┗ 📂 "Top-down first"
┃
┣ 📂 Market Structure
┃ ┣ 📂 Higher Highs
┃ ┣ 📂 Higher Lows
┃ ┣ 📂 Lower Highs
┃ ┣ 📂 Lower Lows
┃ ┗ 📂 "Trend before trade"
┃
┣ 📂 Trend Analysis
┃ ┣ 📂 Uptrend
┃ ┣ 📂 Downtrend
┃ ┣ 📂 Sideways Range
┃ ┣ 📂 Trendline Check
┃ ┗ 📂 "Do not fight price"
┃
┣ 📂 Support & Resistance
┃ ┣ 📂 Fresh Support
┃ ┣ 📂 Major Resistance
┃ ┣ 📂 Zone Marking
┃ ┣ 📂 Multiple Touches
┃ ┗ 📂 "Levels matter"
┃
┣ 📂 Demand & Supply
┃ ┣ 📂 Demand Zone
┃ ┣ 📂 Supply Zone
┃ ┣ 📂 Strong Rejection
┃ ┣ 📂 Base Formation
┃ ┗ 📂 "Where institutions may act"
┃
┣ 📂 Candlestick Behaviour
┃ ┣ 📂 Bullish Engulfing
┃ ┣ 📂 Bearish Engulfing
┃ ┣ 📂 Pin Bar Rejection
┃ ┣ 📂 Inside Bar
┃ ┗ 📂 "Close tells the truth"
┃
┣ 📂 Breakouts & Breakdowns
┃ ┣ 📂 Range Breakout
┃ ┣ 📂 Trendline Break
┃ ┣ 📂 Support Breakdown
┃ ┣ 📂 Retest Entry
┃ ┗ 📂 "Real or trap?"
┃
┣ 📂 Volume Analysis
┃ ┣ 📂 Breakout Volume
┃ ┣ 📂 Dry Pullback
┃ ┣ 📂 Climax Volume
┃ ┣ 📂 Weak Participation
┃ ┗ 📂 "Volume confirms price"
┃
┣ 📂 Chart Patterns
┃ ┣ 📂 Ascending Triangle
┃ ┣ 📂 Descending Triangle
┃ ┣ 📂 Rectangle
┃ ┣ 📂 Flag & Pole
┃ ┗ 📂 "Pattern with context only"
┃
┣ 📂 Multi-Timeframe Check
┃ ┣ 📂 Monthly Bias
┃ ┣ 📂 Weekly Structure
┃ ┣ 📂 Daily Setup
┃ ┣ 📂 Lower TF Trigger
┃ ┗ 📂 "Alignment is power"
┃
┣ 📂 Trade Planning
┃ ┣ 📂 Entry Zone
┃ ┣ 📂 Stop Loss
┃ ┣ 📂 Target 1
┃ ┣ 📂 Target 2
┃ ┗ 📂 Risk-Reward Check
┃
┣ 📂 Risk Management
┃ ┣ 📂 Fixed Risk Per Trade
┃ ┣ 📂 Position Sizing
┃ ┣ 📂 No Revenge Trade
┃ ┣ 📂 Capital Protection
┃ ┗ 📂 "First survive"
┃
┣ 📂 Trade Execution
┃ ┣ 📂 Wait for Confirmation
┃ ┣ 📂 No Early Entry
┃ ┣ 📂 Follow the Plan
┃ ┣ 📂 Exit Without Ego
┃ ┗ 📂 "Discipline is edge"
┃
┣ 📂 Common Traps
┃ ┣ 📂 Fake Breakout
┃ ┣ 📂 Late Entry
┃ ┣ 📂 Overtrading
┃ ┣ 📂 Ignoring Volume
┃ ┗ 📂 "Market loves teaching fees"
┃
┣ 📂 Post-Trade Review
┃ ┣ 📂 Screenshot Saved
┃ ┣ 📂 Mistake Logged
┃ ┣ 📂 Setup Reviewed
┃ ┣ 📂 Lesson Noted
┃ ┗ 📂 "Journal or repeat pain"
┃
┗ 📂 Final Result
┣ 📂 Clean Setup
┣ 📂 Patient Entry
┣ 📂 Managed Risk
┣ 📂 Profitable Exit
┗ 📂 Stop Loss Also Respected
English