10/
With everything set, I press "Render Animation" to automate the creation, rendering, and saving of multiple variations of the creature.
All these processes have to be repeated for every single creature.
And thats it. Thanks for following.
9/ After meticulously refining each node and calculation, the rendered image is complete.
Saving the final render to the hard drive is the culmination of all previous efforts, achieving the envisioned goal.
With an unusually high body temperature, these creatures roam in massive herds, transforming entire landscapes into barren steppes.
Everything in their path is either devoured or scorched by their heat. 🔥
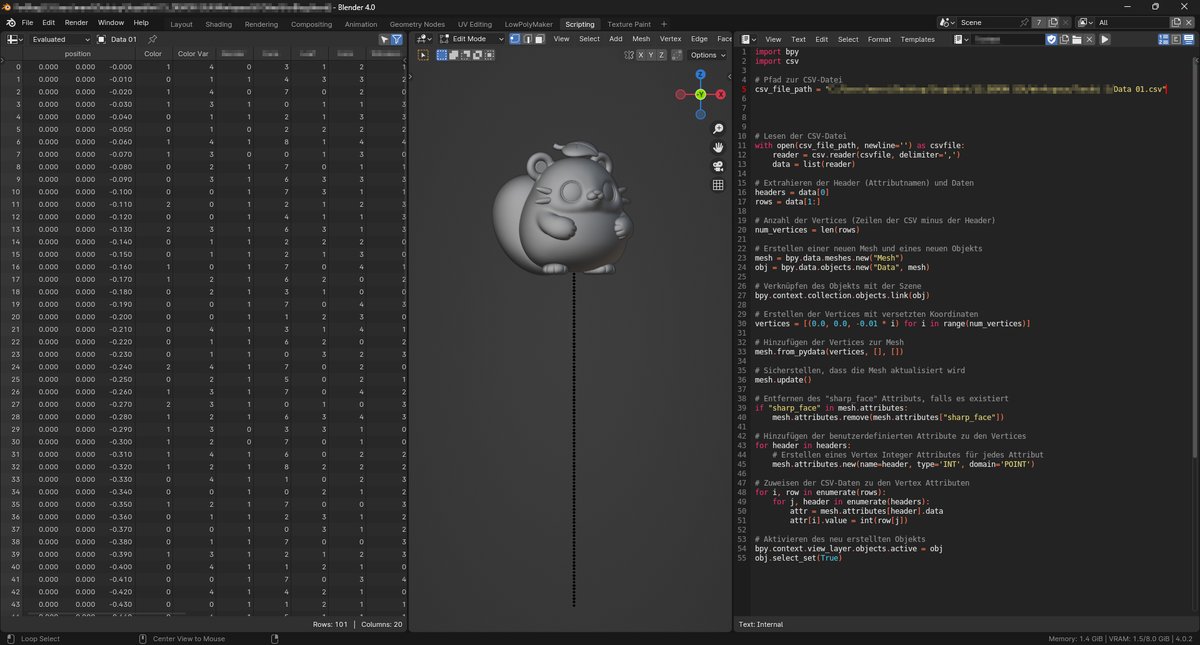
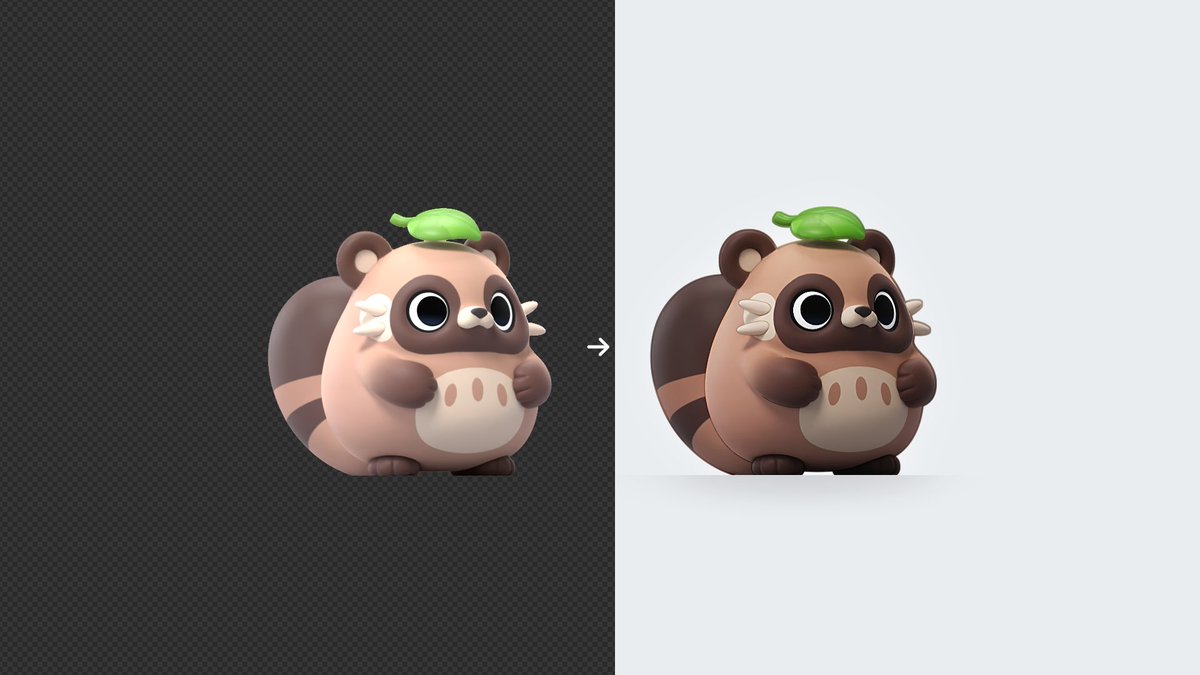
5/ And thats all that is to it.
Pressing "render" creates an almost finished image.
Post-rendering, I refine the image in Blenders compositor, polish and fine-tune the colors.
This keeps the workflow streamlined while ensuring the final result is as polished as possible.
4/ For the camera, I chose an orthographic camera view.
This gives a flat, distortion-free perspective, capturing the creature in a consistent, collectible style across all images.
15/ After everything is set up, changing the frame number also changes the creatures appearance.
All that is left is to render the image of the creature variation.
This method allows me to generate hundreds of unique variations quickly and efficiently!
14/ The final step is to ensure that the material shader works seamlessly with the attribute data.
The attributes nodes in the material are named the same as in the spreadsheet, in that way changing the timeline frame changes the creatures colors!