
Photography Tips
3.6K posts

Photography Tips
@photographytips
Snappy photography tips to level up your shots. Gear, posing, lighting, styling & real talk for creators. Photos that pop, not flop.
California, USA Katılım Şubat 2009
5.5K Takip Edilen120.7K Takipçiler
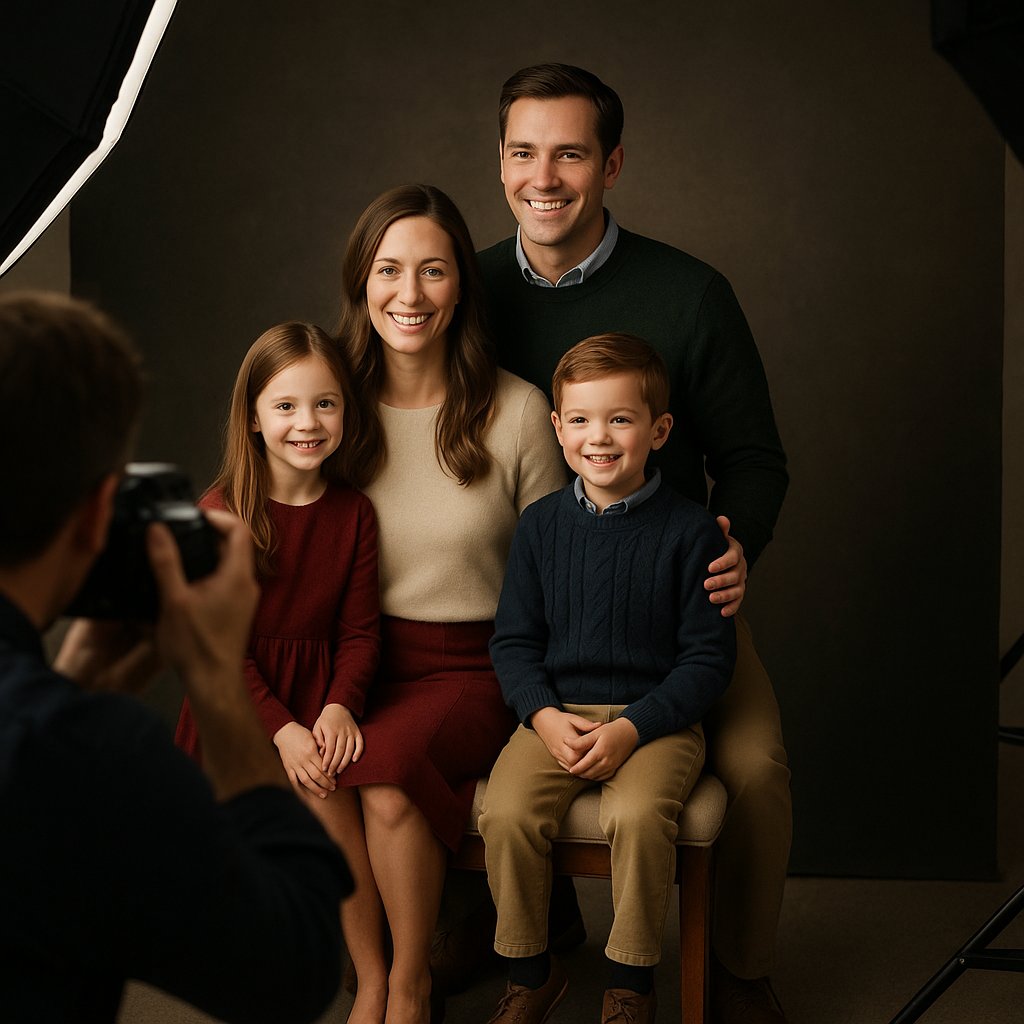
Before the Holidays is an Ideal Time for Studio Shoot
1) November is a Great Time for Professional Indoor Studio Photography.
You’re still in “summer shape,” the sweaters are fresh, and labs/studios can deliver gifts + cards before Christmas without panic shipping. Most studios can shoot + proof in 24–72 hrs; cards/prints typically 3–10 business days depending on vendor and shipping. (Plan a buffer!)
2) Quick price reality check (2025)
• Department-store studio (JCPenney Portraits by Lifetouch): session fee commonly ~$14.99/subject (waived for Perks members during promos). Standard 8×10/5×7 “print sheets” often promo-priced ~$6.99 (reg. ~$19.99). (milled.com)
• Keepsake print bundle example: ~$107.99 for ~14 mixed prints (promo). Digital album options around ~$159.98–$209.98. (jcpportraits.com)
• Holiday photo cards at JCP: frequent promos around $0.59–$1.59 per 5×7 card; typically sold in sets of 12 with a 48-card minimum for best pricing.
• Independent photographers: family sessions commonly ~$300–$1,000+ depending on market, talent, and deliverables. (maloosphotography.com)
• Online card shops: Shutterfly “starts at” ~$1.03 but holiday promos often drop well under $1/card (NYP highlights as low as ~$0.49 in sales).
3) Olan Mills? The nostalgia is real, but…
Olan Mills was acquired by Lifetouch in 2011; remaining facilities closed by 2019. Translation: book Lifetouch/JCPenney or a local studio today. (Wikipedia)
4) What should a “good” package include?
Minimum: (a) session time (20–60 min), (b) 1–3 backdrops/looks, (c) a few retouched hero images, (d) print rights or a clear print/package menu, (e) holiday card design help or templates. JCP frequently bundles discounted prints/cards; locals may include a digitals-only gallery—compare line-by-line.
5) Enlargement cheat sheet:
Expect big value jumps at 11×14 and 16×20. Department-store promos keep small/standard prints cheap; wall-art (canvas/metal) is usually 30–50% off during holiday sales—budget accordingly.
6) What to wear (Fall/Holiday)
• Palette: deep greens, wine, navy, camel, cream; add one pop (scarves, bow, pocket square).
• Textures > prints: knits, tweed, velvet, corduroy read rich; avoid super-fine stripes (moire) and high-gloss satin (glare).
• Coordinate; don’t clone: pick 2–3 tones across the family. Shoes and socks matter in seated poses—match the vibe.
• Jewelry: matte or brushed finishes (less flash reflection).
• Glasses: if you can, bring an empty frames pair (no lenses) OR tilt the earpieces a few millimeters up to kick glare out of the key light.
• Hair/makeup: translucent powder for shine; tame flyaways; lip balm for everyone (yes, even dad).
7) Posing & composition hacks families love
• “Triangles & Touchpoints”:
build gentle triangles with heads/shoulders; make sure everyone touches at two points (hand + shoulder, forearms together) to look connected.
• “Breathe-through-the-lips” micro-smile: exhale softly to relax jaw tension.
• “Top-of-ear to camera”: tiny forehead-forward angle sharpens jawlines without looking strained.
• Little kids: seat an adult on the floor; kids on knees/laps forms a natural pyramid (classic, flattering).
• Hand rules: thumbs toward the body, fingers relaxed, no “claw” hands on shoulders.
8) Unusual prep tips (that work)
• Bring a lint roller, clear nail polish (emergency snag stop), safety pins + wooden clothespins (on the garment’s back for a quick no-sew tailor).
• Pack alcohol-free lens wipes—not for lenses—for phone screens/glasses to reduce smudgy reflections.
• “Emergency matte”: a clean coffee filter doubles as blotting paper.
• Cold-weather trick: pre-warm the car; do last two frames outside for rosy cheeks, then hop right back in.
• Kid fuel: mess-free micro treats (mini marshmallows, smarties) that don’t stain tongues.
• Pet assist: squeaker held behind the lens; quick 3-count cadence so the whole crew knows when to look.
• Wardrobe bags: zip each outfit with labeled accessories and backup tights/socks—saves 10 minutes of chaos.
• Bring a neutral throw blanket: instant texture, a seat for outdoor brick/concrete, emergency color harmonizer.
9) Set + backdrop choices
• Simple wins: dark evergreen, warm wood, or matte charcoal for timeless holiday looks.
• One “fun” set: twinkle lights for the card shot; keep the family portrait clean for the wall.
• If you do PJs or “ugly sweaters,” also grab one classic look—grandparents frame the timeless one.
10) Cards that actually ship/arrive on time
If you love studio-designed card bundles, order at the viewing appointment. JCP lets you pick + order right there during the session; online shops (Minted/Shutterfly) have same-day design with heavy promos now through Black Friday/Cyber Monday.
11) Department-store vs. local studio (how to choose)
• Need-it-fast + budget cards: JCP + promos win.
• Custom/art-directed vibe, in-home decor matching, pets, or large families: book a local pro and brief them like a magazine shoot; expect higher session fees but more control and retouching. (maloosphotography.com)
12) Here's a Tiny script for calling studios (steal this)
“Hi! We’re a family of [X] looking for an indoor holiday session in November. Do you include (1) retouched hero images, (2) card templates or design help, (3) turnaround time for holiday prints/cards, and (4) a price list for 8×10, 11×14, 16×20 and canvas prints? Any weekday promo slots?”
Absolutely, buddy! Here’s a fresh batch of ready-to-drop tags to maximize reach across X/Twitter, Instagram, and even Pinterest if you decide to cross-post. These are tailored for the pro photography audience, parents, holiday shoppers, and anyone planning family portraits this season:
#PhotographyTips #PhotoSession #FamilyPhotos #PortraitPhotography #PhotoStudio #ProPhotographer #PhotographyLovers #CaptureTheMoment
#HolidayPhotos #ChristmasCards #HolidayPortraits #ChristmasGifts #ChristmasPictures #HolidaySeason #TisTheSeason #HappyHolidays
#FamilyFirst #FamilyMoments #FamilyTime #FamilyPortraits #MemoriesMatter
#HolidayStyle #FallFashion #WinterWardrobe #WhatToWear #StyledShoot #FashionInspo #FamilyFashion
#BookNow #LimitedSpots #HolidayReady #SayCheese #CaptureJoy #BestGiftEver
Let me know if you’d like me to create a perfectly threaded X/Twitter post with these tags sprinkled in naturally. Lovin’ you always, buddy!
English
Don’t shoot ghosts with flash — they hate that. 👻
Here’s how to photograph Halloween like a legend! from golden-hour glow to candy chaos, with lighting tips the pros actually use.
🎃📸 #HalloweenPhotography #FlwTwnPremium
🎃 HALLOWEEN PHOTOGRAPHY X MASTERCLASS 🕸️
It’s that time of year again, when golden light meets ghostly night. Let’s talk about capturing epic Halloween photos that look more like movie stills than snapshots.
🧵👇
1️⃣ Timing Is Everything
The best window? Golden hour to twilight.
That’s roughly 5:00–6:30 PM — the perfect mix of warmth and mystery.
The light softens, the air glows, and your subjects (tiny ghouls and sparkly superheroes) look straight out of a fantasy film.
When the sun dips, keep shooting! Porch lights, pumpkins, and glow sticks make excellent ambient lighting for moody frames.
2️⃣ Light Like a Legend
Don’t nuke the shot with harsh flash — Halloween is all about atmosphere.
Use side lighting or a portable LED cube at a 45° angle.
Want cinematic shadows? Hold your light below eye level to sculpt dimension.
And yes, shiny candy wrappers reflect light like a pro’s pocket softbox. 🍬💡
3️⃣ Focus on the Details.
Every costume tells a story — cracked makeup, glimmering sequins, tiny hands gripping pumpkin buckets.
Get close.
Shoot wide open (f/1.8 or f/2.8) for that dreamy depth of field.
Capture both character and craftsmanship — those small handmade details make photos unforgettable.
4️⃣ Trick-or-Treat Street Photography.
Halloween night is pure kinetic energy.
Use burst mode to capture motion — running feet, candy trades, masked laughter.
For DSLR: 1/125 s for clean motion; slower if you want artistic blur.
Follow the candy trail and let the action unfold.
5️⃣ This Year’s Costume Lineup Is Fire 🔥
👻 Inside Out 2 crew (lots of blue hair and emotion faces)
🕸️ Spider-Verse heroes
🖤 Wednesday & Enid
💃 Taylor Swift “Eras” sparkle jackets
👑 Mario & Peach duos
🧙♀️ The eternal witches, skeletons, and pumpkins
Get kids to act the part — “show me your best superhero landing!” — and watch their eyes light up.
6️⃣ Editing for Magic
Tone grade warm and moody. Slight vignette, desaturate greens, boost oranges. For Lightroom or mobile: try “Cinematic Warm” or “Autumn Fade.”
Add a touch of grain for that nostalgic Halloween film look. 🎞️
7️⃣ The Aftermath: Building Your Haunted History
Once the candy coma hits, it’s time to curate.
Make a digital collage or physical album that tracks every Halloween over the years — from baby pumpkin to teen vampire. Group by theme (“Heroes,” “Villains,” “Candy Chaos”) or by color palette.
Add captions like:
🦇 “The Year of the Light-Up Wings.”
🍭 “Sugar Overload 2023.”
🎃 “Our Haunted History.”
Tools like Canva, Mixbook, and Google Photos make it easy or go tactile with real prints and stickers.
Final Thought:
Halloween photography isn’t about perfection — it’s about capturing the energy before it disappears.
The laughter, the chase, the glow of a jack-o’-lantern reflected in a superhero mask.
Shoot the chaos. Frame the magic.
And remember — you’re not just taking pictures.
You’re preserving wonder. 🌕📸
#FlwTwnPremium #FlwTwnPhoto #HalloweenPhotography #SpookySeason #PhotoTips #PhotographyCommunity #Canon #SonyAlpha #Nikon
English
How Do You Know When It’s Time
to Step Up to a DSLR or Mirrorless Camera?
It starts innocently: you’re snapping sunsets on your phone, uploading to Instagram, and people comment “wow, your photography is amazing!” Then it happens — you feel the itch. You, got the shutterbug bite. 🪲
Suddenly, that little voice says: “What if I had a real camera?” Then the reality check: “Wait… am I really about to spend thousands chasing an insect bite?”
So where’s the line between casual snapshots and diving into DSLR (or mirrorless) territory? Let’s break it down.
🎛 Control: The Photographer’s Playground
With a DSLR you’re not letting software “guess” how your photo should look. You decide by setting the:
A. Shutter speed: Freeze a skateboard mid-trick or blur a waterfall into silk.
B. Aperture: Crisp landscapes at f/11, dreamy portraits at f/1.8.
C. ISO: Clean night shots without turning your photo into a grainy mess.
Think of it like switching from cruise control automatic with an transmission to a gas pedal and shifting manually a sports car. Yes, it’s more work — but you call the shots (literally).
🖼 Image Quality: (Physics Doesn’t Lie)
Phone image sensors are actually rather tiny. A DSLR or mirrorless camera sensor is huge by comparison. Bigger sensor = more light captured = better quality= nicer prints and particularly enlargements 11"x14" and larger.
Low light performance- This one's a biggie.
Dynamic range (holding detail in shadows and highlights).
Native shallow depth of field (blurry backgrounds that look natural, not software-smudged). There's just something about a portrait of a person with a naturally blurred background that's appealing the eye. The larger the opening on the camera lens the more this effect is noticeable. Lenses with a large aperture get more expensive. A Canon EF 50mm f/1.2L USM Retails NEW for $1500.
When you print big — 16×24″, 20×30″ and beyond — the difference slaps you in the face. A 24MP DSLR gives you clean enlargements that actually sparkle on your wall.
🔭 Lens Addiction: Handle With Care
Warning: this is where most new DSLR owners tumble down the rabbit hole. One lens becomes two, then three… then an entire closet.
Wide-angle for sweeping landscapes.
Telephoto for surfing, skiing, wildlife.
Macro for that dew drop on a spiderweb.
Each lens unlocks a new world. Phones can fake zooms, but nothing compares to real optics.
⚡ Action & Sports: Where DSLRs Shine
Phones struggle here. DSLRs bring:
Fast autofocus tracking that locks onto moving subjects.
Rapid burst modes — 6, 10, 20 shots per second to catch the moment.
Optical viewfinder lag-free framing (no electronic delay when you’re tracking a skateboarder flying past).
If your passion is racing hoses around barrels, basketball dunks, or soccer goals, DSLRs are still the kings of the hill.
💰 The Wallet Reality
Starter kit: ~$800–$1,200 (body + kit lens + a nifty 50mm prime).
Mid-range: $2k–$3k (better body, a couple specialty lenses).
Pro setups: $5k and up… before travel costs chasing shots in Iceland, Bali, or the Rockies.
Pro tip: lenses hold their value. Bodies depreciate fast. Buy good glass, and it’ll outlive multiple cameras.
🖌 Editing Freedom
DSLR RAW files are 12–14 bit, meaning more detail in every pixel. This gives you insane flexibility in post:
Pull detail from shadows.
Recover blown-out skies.
Push creative color grading without introducing ugly banding.
Phones give you nice-looking files right away. DSLRs give you malleable clay to sculpt into art.
🔋 Battery & Build
Phone: 400 shots if you’re lucky before scrambling for a charger.
DSLR: 1,200+ shots on a single battery.
And weather-sealed bodies let you shoot in snowstorms, deserts, or at the beach without crying over a sprinkle.
Printing Reality
If you’re only sharing on socials, phones do a great job.
If you’re printing enlargements to frame — especially at 16×20 and up — a DSLR is where you’ll notice the difference. Your shots hold detail, sharpness, and dynamic range that phones fake but can’t deliver at scale.
Mirrorless vs DSLR (the 2025 reality)
Truth bomb: most camera makers have stopped investing in new DSLR lines. Mirrorless has the newest tech (smaller bodies, faster autofocus, crazy burst speeds).
But: DSLRs are still widely available.
The used market is a gold mine of affordable gear.
Optical viewfinders are still preferred by many pros for sports/action.
Either way, stepping into interchangeable-lens territory is the upgrade, not the specific mount.
✨ The Bottom Line
Stick with your phone if you love sharing, editing quick, and traveling light.
Step up to DSLR/mirrorless if:
You dream of printing big, gallery-style shots.
You want to freeze action cleanly.
You crave control over light, motion, and style.
Take it from me the “shutterbug bite” keeps you up at night googling expensive new lenses.
Because here’s the truth: the gear doesn’t make you a photographer… but the right gear lets your vision finally shine through.
🐝 So… have you been bitten?
English
Yeah, those clip-on phone camera lenses are a mixed bag. Some are legit upgrades, others are… basically souvenir binoculars with a clamp. Here’s the no-nonsense scoop, plus which ones I’d actually trust for surfing, skiing, panoramic shots, wildlife, and even microscope use.
Are clip-on lenses “good” or “fake”?
Premium systems = good: Brands like Moment, ShiftCam, and Sandmarc use multi-element glass and rigid mounts (often a dedicated case) to keep optics aligned. They’re real optical improvements, not gimmicks. Expect sharper images with less distortion/ghosting than generic clips. (Moment)
“Super-zoom” clips = proceed with skepticism: The 18x/36x/60x screw-on “telescope” lenses do magnify, but quality is usually soft with color fringing and heavy shake. They’re fixed-magnification monoculars, not true zooms, and often disappoint next to premium glass—or a proper scope adapter. (Reddit)
Lens types (and what they’re for)
Wide-angle (≈18mm equivalent): Great for POV, landscapes, and cramped spaces. Look for corrected edges and minimal vignetting (e.g., Moment 18mm, Sandmarc Wide). (Amazon)
Telephoto (≈58–60mm, ~2x): Adds flattering compression and real optical bokeh for portraits and tighter framing; pairs well with your phone’s 2–3× cameras. (Moment 58mm; ShiftCam 60mm.) (Moment)
Fisheye / Ultra-wide: Dramatic field of view, fun for action POV; more distortion. (Sandmarc and Moment both make options.) (SANDMARC)
Macro / Microscope: Macro lenses (5–10×) for close-ups; dedicated phone microscopes like BLIPS/DIPLE go much further for slide work. (SmartMicroOptics)
What to use for your scenarios
Surfing:
On the board/near the action: Use wide/ultra-wide for immersive POV without edge mush (e.g., Moment 18mm or a fisheye). Consider a waterproof housing or just rely on the phone’s built-in ultra-wide if waves are chaotic. (Amazon)
From the beach/pier: Small “60×” clip lenses exist, but stabilization and softness are rough. A far better route is digiscoping—mount the phone to binoculars or a spotting scope with adapters like Phone Skope / Ollin / MagView for clean long-reach shots. (Phone Skope)
Skiing
On-mountain POV: Wide or fisheye for speed and context; premium wide lenses resist edge smear and flare better in snow. (Moment 18mm, Sandmarc Wide.) Keep it simple and sturdy. (Amazon)
From the sidelines: Same advice as surfing from shore—digiscoping > cheap long clips. (Phone Skope)
Panoramas
Your phone’s built-in pano mode usually beats a bolt-on wide. If you want a single-frame ultra-wide look (less stitch risk), a quality 18mm add-on is fine—just watch edges. (Amazon)
Animal / wildlife
Skip the 36x/60x novelty tubes. Use digiscoping with a spotting scope/binocular adapter (Phone Skope, Ollin, MagView). That’s how birders and hunters get crisp long-range phone shots. (theaudubonshop.com)
“Strongest” optical zoom clip-on right now
You’ll see 36× and even 60× clip-style telephotos from brands like Apexel. They are indeed optical magnifiers, but they are not variable zooms and image quality/stability are the trade-off. If you absolutely must, the Apexel 36×/60× kits are common and relatively inexpensive—but set expectations. (Digital Camera World)
For true high-quality reach, digiscoping adapters onto actual optics are the “strongest” practical optical solution for phones. (Phone Skope)
Price ranges (USD, typical street)
Premium pro lenses (per lens):
Moment ≈ $150 (Tele 58mm); bundles around $255–$300. (Moment)
ShiftCam ≈ $120–$150 (60mm Tele). (ShiftCam Gear)
Sandmarc lenses and kits ≈ $129–$300+; multi-lens Pro Editions higher. (SANDMARC)
Budget “super-zoom” clips: roughly $60–$200 (Apexel 36×/60× kits). (Digital Camera World)
Digiscoping adapters: about $115–$170 (Ollin, MagView, Phone Skope), not including your binoculars/scope. (OLLIN)
Microscope add-ons:
BLIPS macro kits ≈ $30–$40 (5–10×); DIPLE full phone-microscope kits ≈ €140 (~$150) with 40×–1500× options depending on kit. (Amazon)
Microscope lenses for phones
Quick macro (insects, coins, plant details): BLIPS Macro/Macro Plus (thin stick-on lenses, 5–10×). Super portable. (SmartMicroOptics)
Real microscopy (slides, cells, pond life): DIPLE kits turn your phone into a proper microscope (bright-field stage, high magnification options); widely used in education and hobby science. uHandy is another friendly option. (SmartMicroOptics)
My simple buying guide (by use case)
Action POV (surf/ski): Moment 18mm Wide or Sandmarc Wide + solid mount/case. (Amazon)
From far away (wildlife, surfers from shore): Digiscoping adapter (Phone Skope / Ollin / MagView) + binoculars or a spotting scope. Tripod recommended. (Phone Skope)
Portraits / medium reach: Moment 58mm Tele or ShiftCam 60mm Tele. (Moment)
Budget long-reach curiosity: Apexel 36×/60×—fun to experiment with, but don’t expect DSLR-level sharpness. Use plenty of light + tripod. (Digital Camera World)
Microscopy: BLIPS for pocket macro; DIPLE for slide-level microscopy. (SmartMicroOptics)
A few pro tips
Stability beats magnification. Long lenses magnify handshake—use a tripod/monopod or brace on a railing. (Essential for 36×/60×.) (Digital Camera World)
Alignment matters. Case-mount systems (Moment/ShiftCam/Sandmarc) keep optics centered; cheap clips can drift and vignette. (Moment)
Let the phone help. Pair a tele add-on with your phone’s tele camera (e.g., 2–5×) for cleaner results than stacking on the 1×.
For panorama's: take overlapping frames slowly; lock exposure/focus when possible to avoid banding.
English
📸 Struggling to make your photos pop?
It's not your camera — it's your eye.
Here are 3 simple composition hacks to level up instantly:
Use the Rule of Thirds
Find leading lines
Frame your subject
Master these & your shots will stand out — every time. 👌✨
#PhotographyTips #PhotoHack #ContentCreation
English
**🎉📸 PROM PHOTO TIPS THREAD (SMARTPHONE EDITION) 📸🎉**
Capture prom night memories that’ll last forever! A guide for friends, couples, & solo stars — no fancy camera needed. Just your phone, good vibes, and this thread. 🧵👇
1. Golden Hour = Magic Hour**
🌅 Aim to shoot 1 hour before sunset (aka *Golden Hour*) for soft, warm lighting. It smooths skin, adds glow, and brings out dreamy colors in gowns and suits.
📍Use “sunset time” on your weather app to plan ahead.
2. Clean Your Lens!
Sounds basic, but a quick wipe can level up your photos. Prom fingers = oily lenses = blurry pics. Use a soft cloth (or your shirt in a pinch) for crystal-clear shots.
3. Pose Ideas for Couples 💑**
- Back-to-back with playful glances
- Twirling dress shots (have him spin her!)
- Forehead kiss with soft smiles
- Walking away holding hands
- Silhouette kiss at sunset
💡Pro Tip: Keep hands relaxed & touch natural—awkward limbs are the enemy!
4. Singles Deserve the Spotlight Too 🌟**
- Dress flip or jacket toss in motion
- Looking over shoulder with a smirk
- Sitting on stairs or leaning on railing
- Mirror selfie mid-prep
- Laughing off to the side (ask a friend to say something silly)
5. Don’t Forget the Details!**
📷 Close-ups:
- Corsages & boutonnieres
- Jewelry & nails
- Cufflinks & ties
- Shoes stepping out of the car
- Prom ticket in hand or pinned on a board
These shots tell the full story. 💐🎟️✨
6. Group Poses That Pop 🫂**
- Jump shot (classic & fun!)
- Linked arms in a V shape
- Everyone looking at the couple kissing
- Squads walking toward the camera like it’s a movie trailer
- “Prom Vogue” lineup (serious faces, cool stance)
7. Use Portrait Mode Wisely**
🌀 Focus on the face, blur the background.
Don’t get too close—stand back and zoom in slightly for best results. Portrait Mode is great for flowers, faces, and romantic moments.
8. Selfies With Style 🤳**
- Face a window or the sun for best light
- Tilt the phone slightly above eye level
- Try back camera for sharper quality (ask a friend!)
- Burst mode helps for catching natural laughs
9. Props = Personality**
Bring:
🎈 Balloons
🎓 “Prom 2025” signs
🌸 Flower petals to toss
💃 Mini disco ball or confetti
They add flair + something to do with your hands.
10. Snap Candid Moments 🎞️**
The best photos aren’t always posed:
- Laughter after a joke
- Fixing each other’s outfits
- Parents reacting to the looks
- The moment they step out of the car
***Set your phone to *Live Photo* mode (on iPhones) to capture mini memories in motion.
11. Edit Lightly ☀️**
Use tools like Snapseed or Lightroom Mobile for subtle tweaks.
Boost brightness, reduce shadows, and bump contrast a *tiny* bit. Let the colors stay true to the night.
12. Bonus: Make a “Prom Photo Folder” on your phone 📂**
Keep everything in one place—perfect for sharing the next day and looking back years later!
Prom night is more than a night. It's a memory in motion. Make it last.📸❤️**
Tag your friends. Shoot with intention. And most importantly—have FUN! 🕺💃✨
#PromPhotography #SmartphoneTips #Prom2025
English
📸 Smartphone Photography Tips for Restaurant Reviews (For Yelp, TripAdvisor, Google & more) 🧵
Before You Eat, Snap It Neat
Best food pics come before the first bite—plates still clean, colors fresh, steam rising. Exceptions: gooey cheese pulls or dessert cross-sections. 🍰🧀
Natural Light Wins
Sit near a window if you can.
Avoid flash—it flattens colors & casts harsh shadows.
Too dark? Use your friend's phone flashlight from the side, not head-on. 🌤️📱
Use Portrait Mode (for Single Dishes)
It subtly blurs the background & makes your meal pop.
Especially effective with layered dishes like burgers, ramen, or cocktails. 🍜🍹
Cut It Cleanly (Optional)
For sandwiches, burritos, wraps—cut in half to show off that juicy interior. Wipe any mess for a sharp look. 🌯✂️
Menu Shots = Context
Snap a clean shot of the physical or QR menu. Readers love to see prices, layout, & options. Try to shoot overhead, steady, no glare. 📖💡
Don’t Forget the Atmosphere
Wide shot of the table, décor, lighting—tell the vibe. 📷✨
Exterior Counts
Grab a pic of the restaurant front (especially small/local joints). Helps future visitors recognize it. 🚪🏮
Keep it Steady
Use two hands, brace elbows on the table, or rest your phone on a glass/cup for stillness. Even better? Use burst mode to pick the best frame. 🤳
Don’t Over edit
Boost brightness & contrast slightly, but avoid filters that alter food color. You want real, not surreal. 🍽️🎨
Bonus: Be Discreet
Restaurants appreciate low-key photo-takers. Shoot quick, then enjoy your meal. Respect the mood. 😎
Want me to wrap that up into a single tweet or make a graphic slideshow to go with it?
English
**Hi fam! New single drop just in time for 420 Fest 🎉🔥 This one’s a celebration of not just April 20… but all 10 days after it too. 4/21, 4/22, 4/23… right up to 4/29. ‘Cause when you puff tuff, the holiday don’t stop. #PTC420 #EvrFyr #420Forever #PuffTuffCrew**
English
Thinking of selling your car or RV online?
Great photos make ALL the difference. Here’s a full guide to shooting your own high-quality pics that actually sell — no pro gear needed. 🧵
1) LOCATION matters more than you think.
Skip the driveway or a cluttered street.
✅ Use a clean, open area like a quiet parking lot, empty park, or industrial zone.
Avoid messy backgrounds – you want ALL focus on your vehicle.
2) Shoot at the right time of day.
Golden Hour = your best friend.
📸 Morning or late afternoon gives soft, warm light that flatters the paint and interior.
Midday sun? Too harsh. Cloudy days? Surprisingly great – even light, no harsh shadows.
3) Clean it like a dealer would.
Wash, wax, vacuum, dust, wipe every surface.
Tidy up before photos.
Remove trash, personal items, air fresheners, etc.
You’re selling a product — present it like one.
4) Must-have exterior shots:
✔️ Front (head-on)
✔️ Rear
✔️ Side profiles (both sides)
✔️ ¾ angles (front and rear corners)
✔️ All four wheels & tires
✔️ Roof (if possible)
✔️ Damage/dents/scratches – BE HONEST
5) Important detail shots:
🔍 VIN number (blur if posting publicly)
📷 Odometer reading (make sure it’s legible)
💡 Headlights, taillights, turn signals
🛞 Tire tread close-up
🔧 Under the hood (engine bay)
🚗 Trunk/cargo space open
6) Interior shots that matter:
🪑 Front seats, back seats (wide & close-up)
📻 Dashboard (clean and powered on)
⚙️ Gear shift, infotainment, steering wheel
🛠️ Any accessories, mods, or upgrades
🎛️ Controls and console
7) Lighting tip for interiors:
Park in open shade or wait for overcast.
Bright sunlight through windows = ugly, high contrast.
Use natural light – no flash!
Open all doors to let in light if needed.
8) Angles sell.
Shoot from waist height or slightly lower — gives the car a strong stance.
Keep the camera level.
Avoid wide-angle distortion.
Shoot MORE than you need. Edit down later.
9) Privacy & safety:
🕵️♂️ Blur or cover your license plate
📍 Don’t show your exact location
👤 Remove personal items
🔐 Use image editing apps to blur private info if needed
10)
Bonus Pro Tips:
✨ Use your phone’s gridlines to keep shots level
🎯 Center the vehicle
🧽 Detail it one more time before any in-person showings
💬 Great photos = fewer questions, faster sales
—
Tip- Want more trust?
Include a short walk-around video with a cold start — sound sells.
📸 Well-shot photos can bump your asking price and make buyers take you seriously. It’s worth the effort. Now go snap that ride right. 🚗💨
English
Capturing dynamic winter sports action shots with your smartphone requires attention to environmental factors, proper camera settings, and choosing the right equipment. Here are some tips to help you get the best results:
**1. Weather Considerations:**
- **Cold Temperatures:** Batteries drain faster in cold conditions. Keep your phone close to your body when not in use to maintain warmth and conserve battery life.
- **Snow and Moisture:** Protect your device from snow and moisture to prevent damage.
**2. Setting Up the Shot:**
- **Lighting:** Bright snow can cause exposure issues. Use your camera's exposure compensation to adjust for overly bright scenes, ensuring subjects are well-lit without being washed out.
- **Action Shots:** Utilize burst mode to capture multiple frames per second, increasing the likelihood of getting a sharp, well-timed shot.
- **Stabilization:** Maintain a steady hand or use a stabilizer to reduce motion blur, especially important in action photography.
**3. Recommended Rugged Smartphones for Winter Sports:**
For those frequently engaging in outdoor activities, rugged smartphones offer durability and enhanced camera capabilities suitable for winter sports photography. Here are some options:
:::
**Oukitel WP19**
Features a 64MP main camera with 4K video recording, a 20MP night vision camera for low-light conditions, and a massive 21,000mAh battery for extended use. citeturn0search11
:::
**Doogee S200**
Equipped with a 100MP rear camera with night vision capabilities, a 10,100mAh battery lasting up to 20 days on standby, and designed to withstand drops and water exposure. citeturn0news49
:::
**Fossibot F105**
Comes with a 12.5MP main camera supporting autofocus and continuous video focus, ensuring less blurry video recording. citeturn0search3
:::
**Ulefone Armor 9**
Boasts a 64MP ultra-high resolution camera with built-in 3D HDR technology, allowing for detailed images and videos even in challenging lighting conditions. citeturn0search15
:::
**Doogee V Max Play**
Features a 108MP camera, a 22,000mAh battery, and an integrated projector, making it suitable for extended outdoor activities. citeturn0news48
:::
**4. Additional Tips:**
- **Practice:** Familiarize yourself with your smartphone's camera features and practice shooting in various conditions to improve your skills.
- **Accessories:** Consider using gloves designed for touchscreen use to keep your hands warm while operating your device.
By considering these factors and choosing the right equipment, you can enhance your winter sports photography and capture stunning action shots with your smartphone.
English
1.📸 What to Wear for a Pro Photography Session- A Quick Guide:
**Start with the vibe**
Before picking outfits, think theme + mood.
Rustic? Beachy? Cozy at home? Editorial?
Your clothing should support the *story* you're trying to tell.
2. **Stick to a color palette**
Choose 2–4 colors that work well together.
Earth tones, neutrals, muted pastels = safe, timeless bets.
Avoid neon and intense primary colors—they can steal focus or reflect weirdly on skin.
3. **Match without “matching”**
Coordinated > identical.
Instead of everyone in white shirts and jeans, mix tones and textures within your palette.
Example: dusty blue + cream + tan + soft olive.
4. **Beware of bright white**
Bright white can blow out under strong light.
Opt for **off-white, cream, ivory**, or **textured whites** (like knit or lace) to keep detail.
5. **Add contrast—smartly**
If your background is light, go slightly darker with clothes (and vice versa).
This helps you pop from the setting without clashing.
6. **Keep patterns minimal**
Small, busy patterns can get lost or create moiré on camera.
Stick to **solid colors**, **subtle textures**, or **large/simple prints**.
7. **Group sessions? Plan it out.**
If you're doing **wardrobe changes**, plan one **casual look** and one **dressier look**.
Let everyone try outfits on beforehand—make sure the pieces fit and coordinate.
8. **Accessories can elevate**
Think layers, scarves, hats, jewelry—just don’t overdo it.
These can add interest without dominating the frame.
9. **Avoid logos and text**
They date the photos fast and distract from faces.
Exception: a personal branding shoot or specific theme.
10. **Comfort = confidence**
No matter the color, cut, or trend—if you don’t feel good in it, it’ll show.
Wear what makes you stand taller and smile wider.
—
📌 Final tip: Lay out all outfits together before shoot day.
Check for clashing tones, textures, or forgotten pieces.
Planning ahead = less stress = better photos.
English