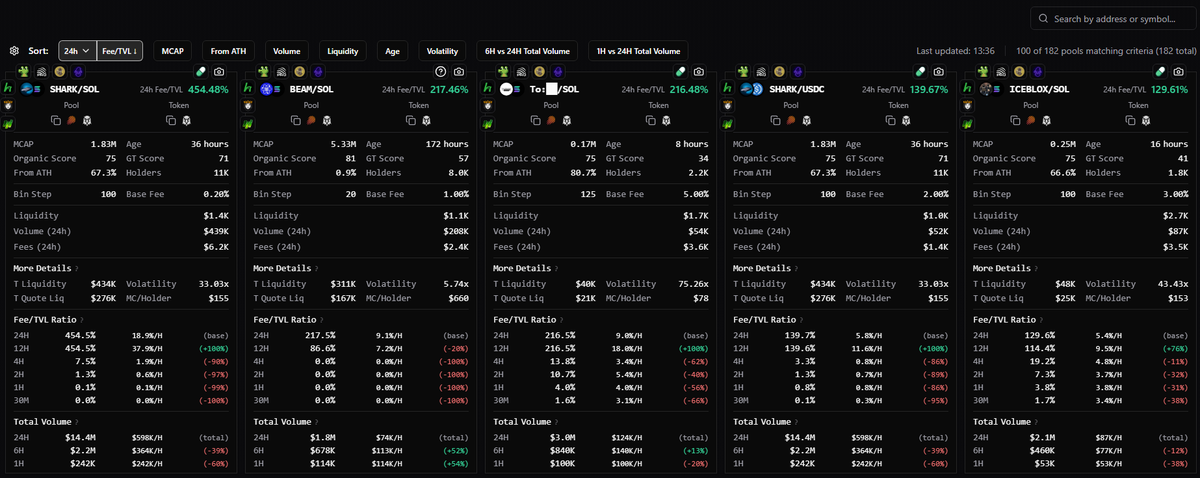
1/ Identifying best pairs & pools: To find the most efficient DLMM pairs & pools within my risk tolerance, I check the excellent Tokelo tool by @KalindroDB 4-5 times a day using the following filters: • 24h Fee/TVL Ratio: Projected (top of the page) This metric equally weights fee generation across different time frames. If a token generates proportionally more fees in the last 6 hours than over 24h, it means fee activity is increasing — the pair will move up the list. Big thanks to @KalindroDB for building this feature so quickly! • Min Market Cap (M): 5 The lower the market cap, the higher the likelihood of a rapid drop below range. • Min Liquidity (K): 200 Deep liquidity matters for two reasons: (1) I can deploy capital without overly diluting fee generation, and (2) tokens with high liquidity are generally "stronger" (i.e., less likely to rug or crash -50% in a short window). • Min Bin Step: 80 Below 80 bin steps usually means much more active management and higher risk of being out of range (leading to significant IL). • Min 24h Fees (K): 5 Ensures the pair has generated meaningful fees in the last 24h. • Quote Token: SOL I exclusively use SOL as the quote token — my goal with Meteora DLMM is to accumulate as much SOL as possible in anticipation of a price rebound. • Show Single Best Fee/TVL Pool Per Token: Yes This keeps the display clean and avoids clutter from multiple pools per pair. • Max Bin Step: 250 Above 250, pools are usually not efficient enough in terms of fee generation.